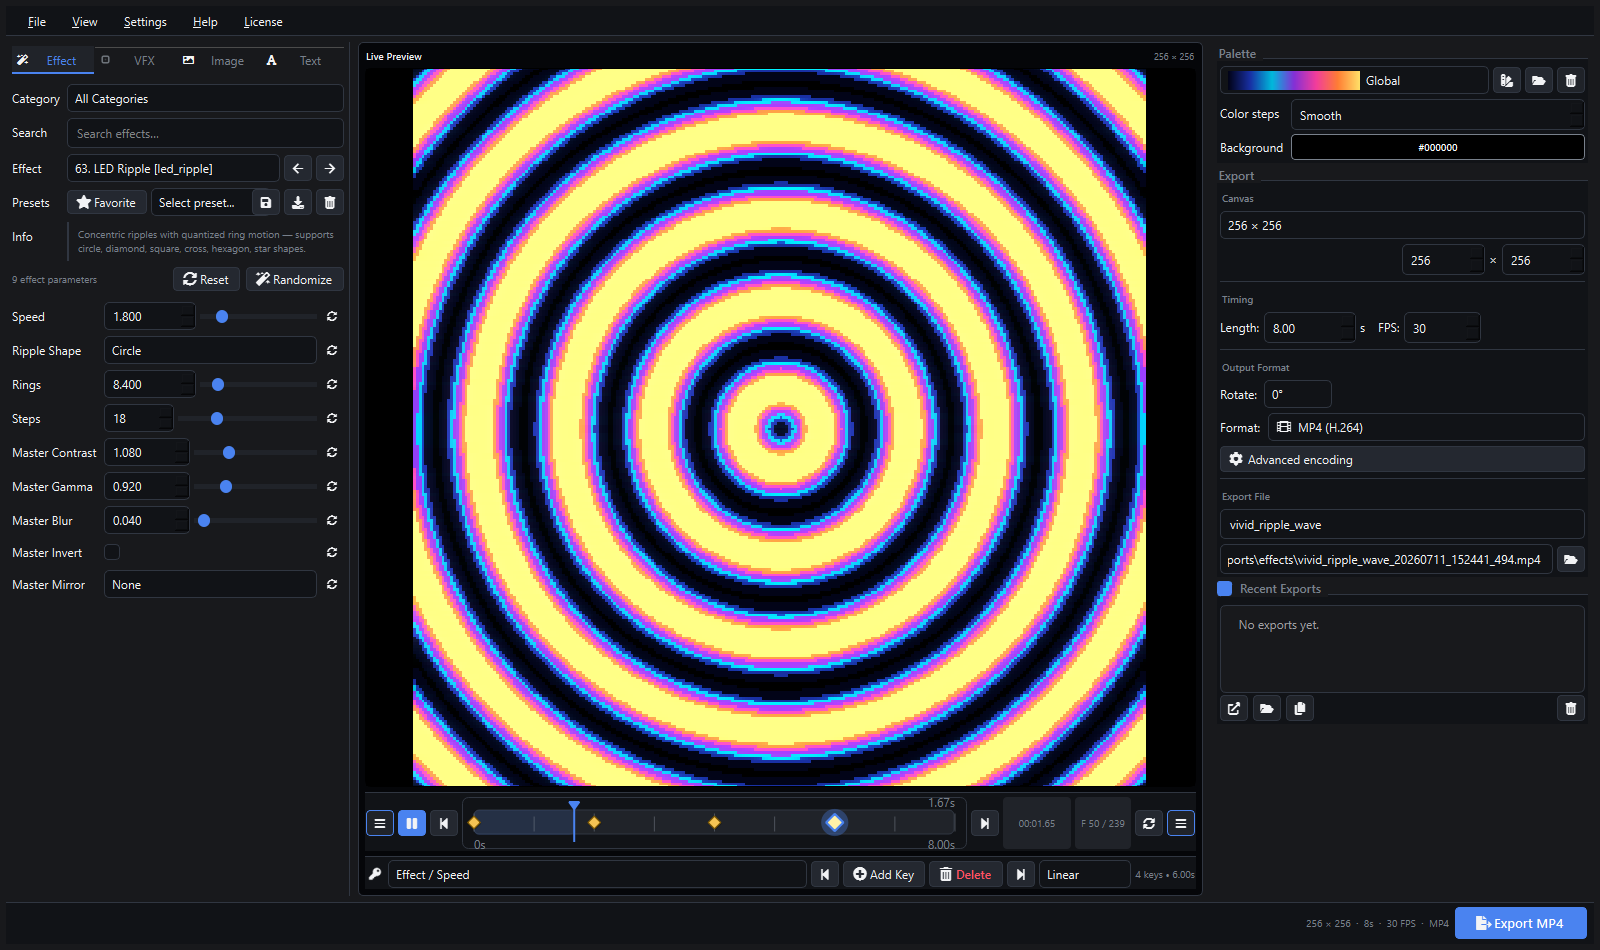
This tutorial explains the complete Pixel LED Animator 3 workflow, from activation to final export. You will create a colorful effect, customize its palette, add VFX, animate parameters with keyframes, save a preset, and export the result for an LED or pixel-mapping workflow.
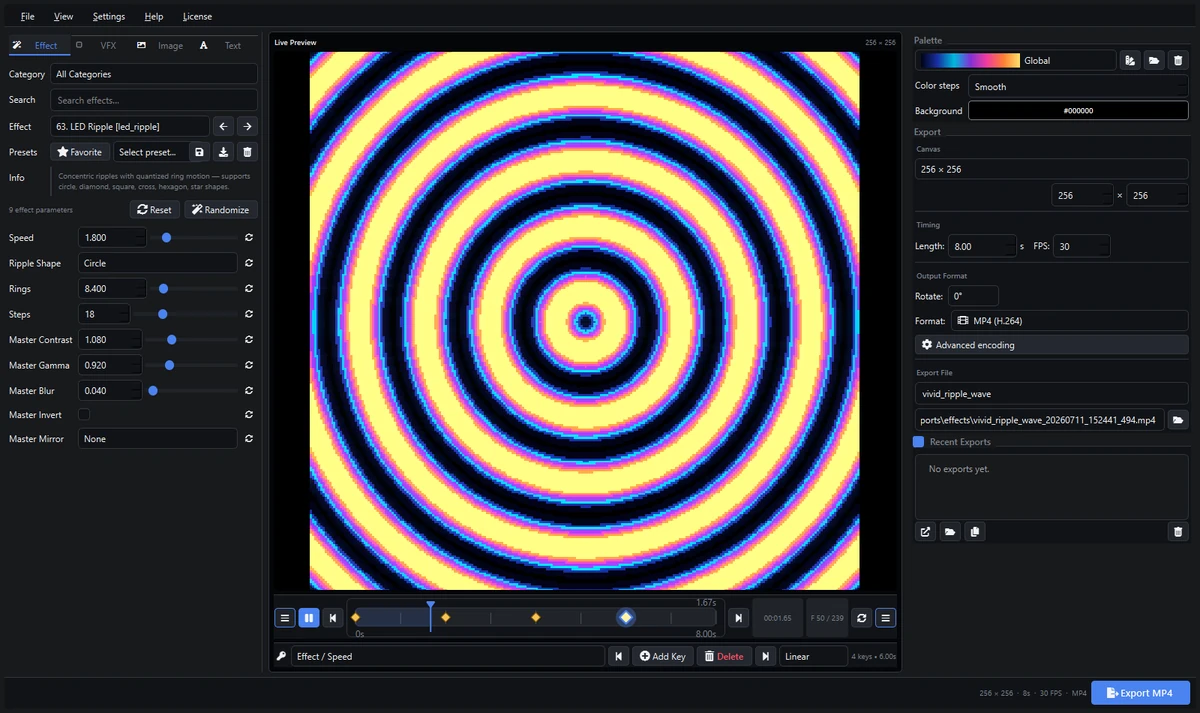
Pixel LED Animator 3 is a standalone Windows editor with 145 effect generators. The current interface uses three main work areas: editing controls on the left, live preview and keyframes in the center, and palette plus export controls on the right.
1. Install and Activate Pixel LED Animator 3
- Purchase Pixel LED Animator 3 from the official Lemon Squeezy product page.
- Download the installer from your Lemon Squeezy purchase.
- Run the installer and start Pixel LED Animator 3.
- Enter the buyer email used for the purchase.
- Enter the supplied license key and select Activate.
One Windows PC can be active per license. The application verifies the license online, so an internet connection is required when starting and while using the software. If you move to a different PC, the existing activation must be reset before the new machine can activate.
2. Understand the Workspace
Left editor panel
The left side contains four tabs:
- Effect: Choose from the effect library and adjust effect-specific parameters.
- VFX: Add finishing effects such as bloom, sparkles, trails, scanlines, chromatic processing, tiling, and vignette.
- Image: Add an image or logo over the generated effect.
- Text: Add styled and animated typography.
The Effect tab also contains category and search controls, favorites, effect presets, a description of the selected generator, Reset, Randomize, and the generated parameter controls.
Center preview and keyframe editor
The center is the live preview. The transport controls let you play, pause, scrub, jump between frames, and loop the animation. Directly below the transport is the keyframe editor, where you select a parameter track and manage its keys.
Right palette and export panel
The right side contains:
- Palette selection and the Color Editor
- Smooth or stepped color mapping
- Background color
- Canvas dimensions
- Duration and frame rate
- Rotation and export profile
- Output filename and directory
- Recent exports
The bottom bar shows a summary of the current output and the main Export button.
3. Create Your First LED Effect
This example uses the LED Ripple generator.
- Open the Effect tab.
- Use Search and enter
ripple. - Select LED Ripple from the Effect list.
- Set Ripple Shape to Circle.
- Set Rings between
8and12for a clear concentric pattern. - Set Speed around
1.2as a starting point. - Use Steps to control how strongly the pattern is quantized.
Press Play in the transport row to see the animation. Try Diamond, Square, Hexagon, Star, or another available shape to produce a different structure without changing the complete effect.
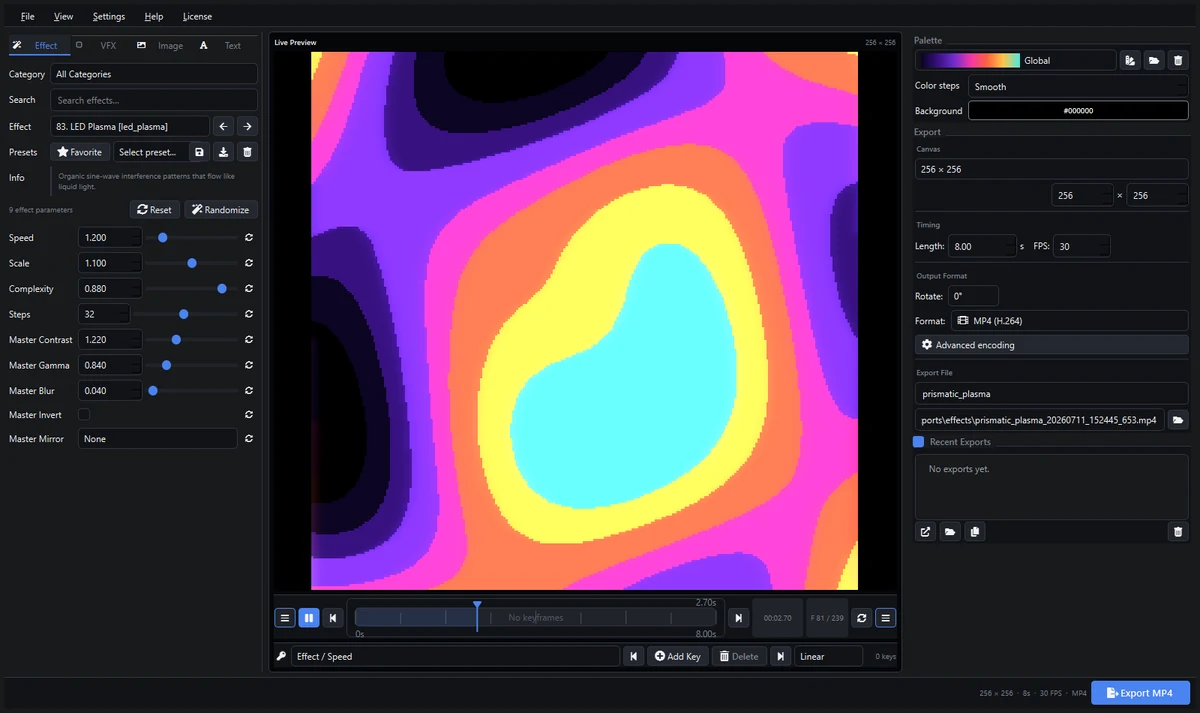
The effect library contains 145 generators. Search for plasma, aurora, tunnel, wave, chaser, kaleidoscope, Mandelbrot, blocks, scanner, snake, particles, or shape-based motion to explore other families.
4. Set Canvas Size, Duration and FPS
Before detailed animation work, establish the basic output timing:
- In Canvas, enter the width and height required by your target workflow.
- Set Length to the loop duration in seconds.
- Set FPS to the required frame rate.
For a small LED matrix, 128 x 128 or 256 x 256 is a practical starting point. Match the exact input requirements of your controller or destination software whenever possible.
For short visual loops, start with 4 to 8 seconds. Use 25 or 30 FPS for smooth general-purpose video, or match the frame rate expected by the final playback system.
Changing canvas size, duration, or FPS affects the final render and the keyframe timeline. These values are project-level settings and are not themselves keyframed.
5. Choose and Edit a Color Palette
Open the palette dropdown in the right sidebar and select a built-in, custom, LEDEdit, or global palette. The preview updates to use that color range.
Select the palette-edit icon to open the Color Palette Editor.
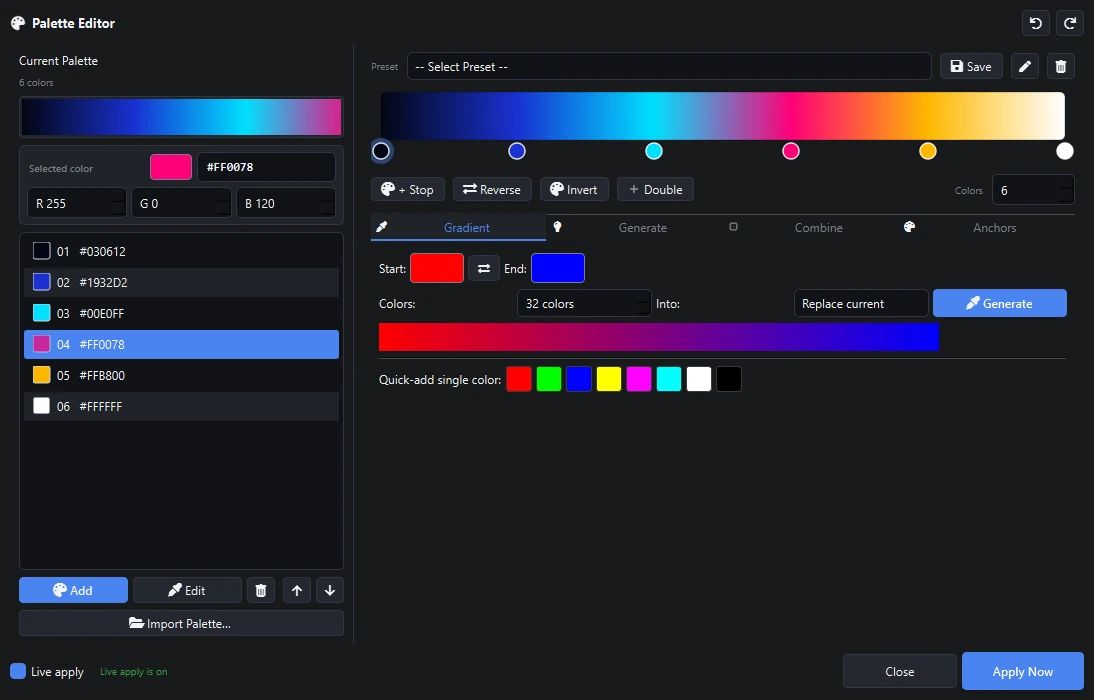
Inside the editor you can:
- Add, duplicate, remove, and reorder color stops
- Edit exact RGB and HSV values
- Use the visual color field and hue slider
- Reverse or evenly distribute a palette
- Resample the palette to a different number of colors
- Combine another palette by prepending, inserting, or appending it
- Save a custom palette preset
- Apply changes live to the main preview
Use Color steps in the main sidebar to choose smooth mapping or a fixed number of color bands. Smooth colors work well for plasma and aurora. Stepped colors produce a more traditional low-resolution LED look.
6. Adjust Common Effect Controls
Every generator has its own controls, but all effects also include common finishing parameters:
- Master Contrast: Separates dark and bright regions.
- Master Gamma: Changes the intensity distribution.
- Master Blur: Softens hard pixel boundaries.
- Master Invert: Reverses the intensity pattern.
- Master Mirror: Mirrors horizontally, vertically, or both.
Make small changes while watching the preview. High contrast can look strong on a monitor but may remove useful mid-tones on real LED hardware. Gamma is often a better first adjustment when most of the palette appears concentrated in one color.
7. Add VFX
Open the VFX tab. Enable only the effects that improve the current visual.
Useful examples include:
- Bloom: Adds a soft glow around bright areas.
- Sparkles: Adds animated highlight particles.
- Trails: Extends motion over time.
- Scanlines: Adds structured horizontal detail.
- Chromatic effects: Separates or shifts color channels.
- Tiling and mirror: Repeats the frame into larger patterns.
- Vignette: Reduces brightness near the frame edges.
Each VFX group has its own strength, speed, size, color, or layer controls. Start with low intensity. Several subtle effects usually preserve LED clarity better than one extreme filter.
VFX parameters can be selected in the keyframe editor and animated over time.
8. Add an Image Overlay
Use the Image tab to place a logo or graphic over the generated effect.
- Enable the image overlay.
- Browse to the source image.
- Choose a fit mode such as Contain, Cover, Stretch, or Original.
- Set horizontal and vertical position.
- Adjust scale and opacity.
- Choose a blend mode when the image should interact with the effect below it.
- Enable an image animation when needed.
Images with transparency are useful for logos and symbols. Keep the source file available at the same path when saving presets because image paths are stored as references.
9. Add and Animate Text
Open the Text tab and enable the text overlay.
Configure:
- Text content and font
- Font size and style
- Text color or gradient
- Alignment and position
- Opacity and character spacing
- Outline width and color
- Shadow offset, blur, and opacity
- Glow radius and intensity
- Text animation type and timing
Use outlines or shadows when text must remain readable over a bright effect. For small LED matrices, use a simple font, short text, and enough size to preserve the letter shapes after scaling.
Text content, font choices, and other non-numeric values use hold behavior when keyframed. Position, size, opacity, and colors can animate between keys.
10. Create Keyframe Animation
The keyframe editor is directly beneath the preview.
Add the first key
- Use the grouped parameter dropdown to choose a track, for example Effect / Speed.
- Move the playhead to
0.00s. - Set the visible Speed control to the desired starting value.
- Select Add Key.
Add another key
- Move the playhead to a later time, such as
3.00s. - Change Speed to a new value.
- Select Add Key again.
The keyframe diamonds appear on the lane. Scrub between them to preview the interpolation.
Edit keys
- Click a diamond to select its time and value.
- Change the visible parameter and use Add Key to update the key at the playhead.
- Drag a diamond to move it with frame snapping.
- Use the previous and next key buttons for navigation.
- Select Delete to remove the selected key.
- Choose Linear, Ease In, Ease Out, Ease In Out, or Hold.
Keyframing is manual. Changing a parameter does not create a key until you select Add Key. Before the first key, the first key value is used. After the last key, the final key value is held.
Numeric values and RGB colors interpolate. Choices, switches, text, font names, and image paths hold until the next key.
11. Save Favorites and Presets
Select Favorite to keep frequently used effect generators easy to find.
To save the current look as a preset:
- Configure the effect, palette, overlays, VFX, timing, and keyframes.
- Select the preset save button.
- Enter a clear preset name.
Presets can preserve effect parameters, palette selection, color steps, background, timing, canvas, profile, overlays, and keyframes. Use the preset dropdown to load a saved configuration later.
12. Export the Animation
- Confirm Canvas, Length, and FPS.
- Select the required rotation.
- Choose an export profile.
- Enter the export filename.
- Select the destination folder.
- Review the preview at several points on the timeline.
- Select the Export button in the bottom-right corner.
Common output choices include:
| Destination | Suggested output | |
|---|---|---|
| Resolume Arena or Avenue | DXV, HAP, HAP Alpha, HAP Q, ProRes, or MP4 | |
| xLights / Falcon Player | FSEQ with Zstd compression, or video matched to sequence workflow | |
| MADRIX | ProRes, DNxHD, HAP, or MP4 | |
| Jinx! | AVI (FFV1 / HuffYUV) or MP4 | |
| Glediator, Lightjams, LEDVision | Common video or image output supported by the destination | |
| LEDEdit | XDAT for compatible workflows, or video when required | |
| Broadcast / Post-production | ProRes, DNxHD 185, OpenEXR sequence | |
| Archival | FFV1 lossless MKV, HuffYUV AVI, OpenEXR sequence |
Recent exports appear in the right sidebar. Use the action buttons to open the file, open its folder, or copy the output path.
13. Export XDAT for LEDEdit
Pixel LED Animator 3 includes a custom XDAT export option for compatible LEDEdit workflows.
- Set the canvas dimensions expected by the LED layout.
- Set duration and FPS.
- Choose the XDAT output profile from Format.
- Enter a filename and destination.
- Export the animation.
- Import the resulting XDAT file into the compatible LEDEdit workflow and verify mapping, orientation, and playback.
XDAT requirements can vary between LEDEdit versions and controller setups. Test a short file first before rendering a long sequence.
14. Troubleshooting
The preview is not changing
- Confirm Animate is enabled or move the playhead manually.
- Check that Speed is above zero.
- Reset the effect parameters.
- Try a different palette or background color.
- Disable VFX temporarily to isolate the effect.
Colors look too flat
- Switch Color steps to Smooth.
- Increase Master Contrast slightly.
- Adjust Master Gamma.
- Edit the palette so its dark, middle, and bright colors are more distinct.
Text is difficult to read
- Increase font size.
- Add an outline or shadow.
- Reduce the brightness of the effect behind the text.
- Use a shorter message and a simpler font.
Export fails
- Choose a writable output folder.
- Avoid unsupported characters in the filename.
- Check that enough disk space is available.
- Test a short duration and small canvas.
- Try the default profile before changing advanced encoding settings.
A license activates every time
Confirm the application can write to its local data directory and that the saved license state has not been removed by a cleanup tool. The machine must also be online for status verification.
15. A Practical First Project
For a reliable first result:
- Choose LED Ripple.
- Set the canvas to
256 x 256, duration to6s, and FPS to30. - Select a colorful palette.
- Use 8 to 10 rings and a moderate speed.
- Add a low-intensity bloom.
- Keyframe Speed at
0s,2s,4s, and6s. - Save the look as a preset.
- Export MP4 for general preview.
- Export the final destination format after the visual is approved.
Continue Learning
Read the Pixel LED Animator 3 release overview for a detailed feature tour, or return to the Pixel LED Animator 3 homepage to review formats and compatibility.